Webinar with EY: Data Insights from Virtual Events

Virtual Events 2.0: Responsive Tactics to MarComms Strategy:
Creating your own session and event is incredibly easy with a few simple steps. Follow along with this quick overview to get started presenting on Glisser immediately.
Hybrid meetings and events are the only answer going forward. Don’t exclude a massive audience from participating with your presentation just because they aren’t in the room. In this video: The value of hybrid meetings How to set up a hybrid meeting or event within Glisser Tips to find the most engagement during your Hybrid […]
Give your audience the full event experience from the comfort of their computer screen. Glisser’s event platform mirrors your physical set up so you can launch your virtual event without missing a beat. In this video: An overview of the event platform Quick view of Sponsor areas, networking options, and session rooms Settings and options […]
Follow along with a tour of a virtual event set up with Glisser. In this video: See the event from the audience perspective Explore rooms and speaker sessions Learn about customization and branding options
This video will walk you through the basics of building your first presentation inside of Glisser. Learn how to upload your slides and begin adding engagement features. In this video: Upload your first presentation Add audience engagement features, polling, quizzes, and more Review of settings allowing you to customize your presentation
Find the right poll type for your audience. Glisser offers a number of different options including image polls to help boost engagement at your next meeting or event. In this video: Explore different polling types Learn about answer options and how to set up your polls Walk through displaying your polls and results to your […]
Keep the attention of your audience and add gamification to your next presentation. In this video: The engagement value of adding a quiz Explore quiz settings and answer options Learn the shortcuts for running the quizzes while presenting
Sharing your slides directly to audience devices is one of the most powerful tools you can give your audience. In this video: Enable the Live Slide Sharing feature Setting and options around Slide Sharing Learn how to automatically share slides with attendees

Glisser stream is Glisser’s very own native streaming platform. With a variety of formats, Glisser Stream is extremely flexible with a breadth of uses. Say goodbye to your reliance on third party streaming platforms and learn how to use Glisser Stream!
The last thing you want is your virtual audience clicking off your event to go search up a piece of content you referenced. Adding related links to your event sessions is a great way to keep the audience engaged. In this video: How to set up Related Links Where your audience will see links to […]

Learning how to use live control is key to running a successful event. Here’s a crash course on everything you need to know about controlling your Glisser sessions.
Digital Note Taking enables attendees to take notes directly from their devices. This video walks you through how to make the most of this feature and explores that data you can gather from your attendees. In this video: Learn to enable note taking on your presentation Removing distractions from your audiences devices Explore how to […]
Sponsorships are a huge source revenue for an event. In the virtual event world you need to consider new ways to help sponsors find value at your event and engage with your audience. In this video: Setting up always on sponsor booths Areas you can promote sponsors branding Other ideas for sponsor opportunities
Ready to you launch your first session? This video explores the view of the presenter. Explore the controls and learn what to expect as you show off your slides. In this video: Hotkeys and Shortcuts every presenter needs How to run Live Polls and display results The presenter interface and settings
Wordly is a third party integration that allows you to translate and caption your sessions live in multiple different languages. With a few quick clicks, you can make your session accessible to all.
There are several different options to monetize your event. One of the most recent and useful monetization options are video interstitials. We provide several opportunities for you to include engaging content at every touchpoint of your event to ensure attendee engagement. Use it as ad space to sell to sponsors, or advertise your own future […]
Put your ROI in center stage and prove your event impact with Glisser analytics. Our event analytics platform provides in-depth insights into your virtual or hybrid events effectiveness, engagement, impact, and outcome. Just jump into your analytics tab in your Glisser Dashboard, choose your event or session, then dive into the numbers or export it […]
Own your Glisser session and learn how to take full advantage of our customization options. Create sessions and events that are beautifully branded to your liking and be able to dazzle your audience with a consistent theme throughout their journey in the Glisser platform. With a few simple clicks, uploads, and choices, control colors, background […]
Our moderation feature makes sure that you can take control over what your attendees are saying in your session. Once you toggle moderation on, the only comments that will be shown are the comments that are approved. It’s as easy as toggling moderation on and clicking a couple icons to get moderation working!

Maintain audience engagement with a wide array of tools. From polls and quizzes to word clouds, games, and social integrations, Glisser provides a smorgasbord of options for you to wow your audiences and empower them to interact with your event. With virtual and hybrid events being more and more prevalent, it’s important to ensure your […]
This article will provide a step-by-step guide on the best way of accessing a Glisser event. First off, how to sign in to your Glisser event If you have been directed to an ‘Enter Glisser code to join’ page, you will need to enter the URL code sent to you, it will be the characters after […]
If you would like to access your analytics for a single session: You must click on analytics. Select your session then click on view analytics. You will be taken to your analytics dashboard where you can view your summary data, participant information, poll votes, and Q&A. If you want to export your data you must click on export, and […]
The live stream function in Glisser can be used for both live sessions and pre-recorded content. To add a live stream link into your Glisser session follow these steps below: Click on Live Stream. Turn on the Live Stream toggle and select LIVE STREAM SETTINGS. Select the MODE of the live stream. Here you can choose between a video conference and […]
Our API integration with Eventsforce will allow you to upload your Entry List for your event, into Glisser from Eventsforce, instead of manually uploading your emails one by one. Step by Step: To import your emails to your Glisser event, please follow the below steps: Access your Data Security settings, where you’ll need to set the ID Capture to Email […]
What is Glisser A2A? Glisser offers a simple solution with our Attendee-2-Attendee connectivity, enabling attendees to share their LinkedIn Profiles and make connections, prolonging networking beyond your event and allowing attendees to make connections in their own time, not distracting them from your event. A2A offers a straightforward and effective way for attendees to view […]
Audience access restrictions are plentiful and can be hugely frustrating for you and your audience members! This article explores the different blockers which could be preventing your audience from accessing the Glisser platform, as well as how to help resolve. If you continue to experience any device related issues, then you may contact the Glisser […]
The audience lottery allows the presenter to select and display random users as the winner. This is a great way to incentivize the audience to participate and gamify your presentation, resulting in a winner amongst all of the delegates. Create Lottery To add a lottery slide, select Lottery from the Add Content drop-down menu and type in your heading. […]
Audience polling is a great way to both engage the audience and provide yourself with insightful analytics post-event. With Glisser, usability is key and it’s easy to add a range of polls into your presentation. Many presenters will ask a question at the beginning of the presentation and then see if the audience’s opinion on […]
If you would like to provide a more seamless experience to your delegates (either via integrating the Glisser audience player within your own web/native application or more simply linking to the Glisser audience interface from content management or emailing system) you can enable audience silent login following this guide. By default, the Glisser audience application […]

AV Equipment Glisser is easy to use, and you don’t need a lot of equipment to get going. Here are a few pointers to help you get going with your AV and WiFi setup. Presentation Tips In order to run a single presentation using Glisser you will need: A laptop connected to your main screen […]
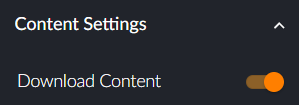
How to Set Up To set up the certificate feature simply log into your Glisser account, select the relevant session and click on the Presentation Settings bar. Select the Content Settings dropdown menu and turn on the Download Content and Download Certificate toggles so they both show as orange. Once you have selected the Download Certificate option, a new window will open where you can […]
With Glisser you have the ability to create a slide deck presentation or an event with multiple sessions. This article will show you how to create your event. The first thing you need to have in mind is the structure of your event. Some questions you might want to consider to create your event are: […]
As a presenter, you have the option to create one of a number of different presentation types – this guide will cover creating a slide deck presentation. Inserting your Slide Deck To insert your presentation into your Glisser dashboard from the Sessions tab, select the Add Session button located at the top right-hand section of […]
Glisser allows the use of social media sites such as Twitter to be integrated into your event. Hashtags are commonplace at live events now, as online buzz is crucial in creating that all-important FOMO, and boosting attendance at the next event. However, events don’t trend unless you encourage your audience to tweet, and a live […]
When your attendees opt in to download your content, a download link is sent to them via their indicated email address at the end of your presentation. You can customise this download email and who the content is sent from in order to stay consistent with your brand and keep interacting with your audience at […]
When handling client information, security is of great importance, and Glisser provides multiple layers of it. Under Data Security, the presenter will see these options listed. They are as shown in the image below: ID Capture ID capture enables you to collect the ID of all of the delegates in the form of an email address […]
Digital note taking in the Glisser web-app is incredibly simple and convenient for you and your attendees. Instead of bringing your notepad and pen with you, use the Notes feature and type your notes directly into Glisser. Notes you make will be tied to the slide you made them against, which you can download at the end […]
In July 2018, YouTube changed the way in which users access being able to embed live streams hosted through their service. In order to place your YouTube live stream into the Glisser LIVE platform, you now need to take extra steps if you previously did not have a YouTube live streaming enabled account. Those that […]
Presenters can collect data from their event in real-time to better understand their audience through different means including Q&A, live polling, and feedback questions. Engagement Index Using the data, the presenter can monitor and measure audience response using an in built engagement index. With this tool, presenters can not only measure participation from the audience, […]
This article will show you how to export analytics data after your Glisser event. After your presentation or event has finished you can export detailed audience data from the analytics tab. Click on Export within the appropriate presentation or event and you can choose to export the audience data in the following ways: Export as […]
There are countless options for how you want to Livestream your event, each depending on how much you want to spend, and how professional you want it to look. Some examples include: Webcam The cheapest and easiest option is to use your webcam. This works well for webinars, although it’s unlikely to look that polished […]
With Glisser’s Guest Accounts you can send your presenters their joining link in advance and still make edits or log out of your account and their joining link will stay the same.When you send your presenters the link to join by clicking on the Copy button next to the Live control view, they will automatically […]
This article provides tips on how to have the perfect ending on a Glisser stream broadcast session. Once the final speaker has concluded, you should wait 7 seconds as there is a latency of 6-8 seconds. You can then advance to the last slide which will have the QR code visible. This slide will trigger […]
Should I choose Live Video Conference or Live Broadcast? Key differences between the two — Live Video Conference allows the audience to participate in the video with their audio and their camera and is ideal for classroom sizes of up to 40, networking or breakout sessions. Live Broadcast is where the audience is not actively participating in the video […]
The use of Glisser Stream RTMP can be managed by your production company or it can be managed by your team with a tool such as OBS Studio. OBS Studio is free to use and must be downloaded onto your device. Download and set up OBS Studio First, you need to download and install OBS […]
If you want to offer Glisser to your delegates from within your DoubleDutch application, you will need to integrate our Audience View. For example, let’s say you have created a presentation and assigned the Glisser code MyPres to it. Delegates can access it via our regular interface using the URL glsr.live/MyPres, but even better if […]
Adding Brella to Glisser as a related link This is the recommended option as it enables your delegates to access the full event agenda in Glisser, whilst having the opportunity to access Brella for any networking etc. The process which you will need to follow is detailed below. Within a session you need to click […]
Adding Grip to Glisser as a related link The process which you will need to follow is detailed below. Within a session you need to click on Related Content and turn on Links. You can then click on Edit Links which then displays a pop up box. You can have up to three related links. You must fill in the […]
If you would like to test Wordly ahead of purchasing, they have a Try-It-Now Feature. This will provide you with 20 free minutes to trial Wordly.If you would like more information on Wordly and to find out more information on how it works please see our support article here. Setting Up Your Wordly Presentation There […]
In order to interact with a presentation, you must first log on to the event or session. The presenter will give you a unique Glisser URL to enter into your browser to access the presentation. You can use any web-connected device to interact with the presentation (phone, tablet, computer, etc.). Simply open up a web-browser […]
To get the most out of an event, it is a great idea to take a familiarize yourself with the event agenda prior to the first session so you can see where everything is taking place and at what time to allow you to interact with an event in the best way possible. Accessing the […]
Wordly can be integrated into your event to deliver real-time translation in up to 21 languages, including Dutch, English, French, German, Spanish, Italian, Japanese and Spanish.The host or speaker must manually instruct Wordly to hear and capture the language to be spoken. This is crucial for accurate transcription and translation. See precise instructions here. Language […]
If you are experiencing any problems during a session or an event and are struggling to resolve these issues, then you may send your browser information to the Glisser team to receive some IT support. This helps us to capture important information regarding your device and the actions you have been taking within the session/event. […]
Once you hit Live Control on your Presentation, you will be directed into our live control green room. In this green room you will be able to view the live stream feed that is coming through. When you are ready for your session to be live and accessible for delegates to view you must click […]
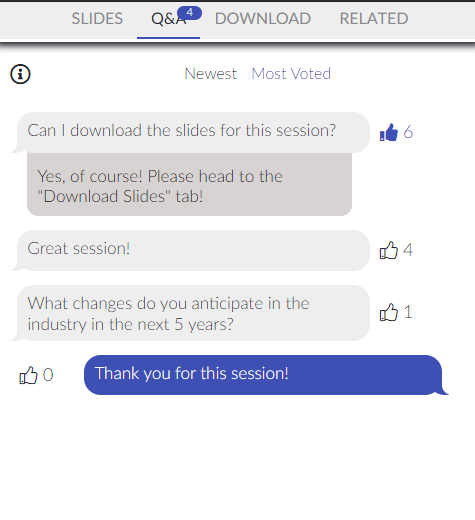
One of the core features of Glisser is the ability to have the audience ask questions to the presenter whilst the presentation is taking place, which can be answered at any point during the presentation. A presenter can either choose to have the questions moderated before appearing on the main screen to be answered or […]
The Glisser platform now offers monetization options to enable you to generate revenue from your events. Glisser can offer opportunities for sponsors to upload videos, images and hyperlinks to appear in the Waiting Room or Lobby Area within events and individual sessions. This raises valuable sponsor awareness to a captive and targeted audience alongside driving […]
After your event has finished, if you’d like to allow your audience to go back to the slides and videos of your presentation/s, you’ll need to modify your session to an on-demand content session. An on-demand content session is a session that has been presented during your event and has no live content. This is […]
Organization slide management allows a session/event owner to share the content with team members in their organization or with individual users.This limits sharing account passwords with others in your organization as you now have the ability to co-work on content together.The ability to share resources is perfect for those of you running multi-day, and multi-room […]
Through a series of settings, you can personalise your presentation to match your brand or event. To edit your chosen presentation or event, select Personalisation from the right-hand sidebar of your Glisser dashboard. Audience URL Your audience URL is the link your audience need to navigate to access your event, which you can publish in […]
Starting Your Presentation Presenting with Glisser is an easy and hassle-free process. This guide will run through the process of presenting and which shortcut keys you can use for specific features. After you’ve logged into your Glisser account, select the session that you wish to present from within your session tab or from within your […]
Related Links You are able to add up to three links to be displayed for each session. This is a great place to include additional content such as downloadable documents, speakers linkedin profiles/emails and links to external meetings that you may want to be hosted outside of Glisser. When a session is live related links […]
Glisser’s Salesforce integration allows you to export attendee interaction data to Salesforce. First, you can add a poll or survey to Glisser as normal, and in doing that you have the option of mapping the data collected to a particular field in your Salesforce account. So for example, your survey form may have a free […]
Your background image is used in various places throughout your presentation or event, for example as a backdrop to the Q&A feed and Polls on the main screen, and as a backdrop to the login pages on the audience mobile web-app. Which Image Should I Use? Your background should be a soft backdrop to your […]
Glisser Stream is our very own streaming solution. Glisser Stream enables you to broadcast a stream (host a one way stream similar to Vimeo and Youtube), or host a video conference (a two way stream ideal for breakout sessions). Live Broadcast Within your session, click on Live Streaming and turn on the toggle. Once you turn on […]
Glisser Stream is our very own streaming solution. Glisser Stream enables you to broadcast a stream (host a one way stream similar to Vimeo and Youtube), or host a video conference (a two way stream ideal for breakout sessions). Video Conference Within your session, click on Live Streaming and turn on the toggle. Once you […]
With Glisser you can live stream your event whilst also making the most out of all the interactive features of the regular Glisser platform. It’s perfect for adding onto your event (hybrid event), or alternatively as a web-only event. Setting up your Presentation You can setup your Glisser presentation as normal. The only notable things […]
This article covers how to set up a live stream on the latest version of Glisser. For an in depth guide on setting up Glisser’s own streaming services, you can go to – Setting up a Glisser Conference Call: https://www.glisser.com/support/setting-up-a-glisser-stream-video-conference/ Setting up a Glisser Broadcast: https://www.glisser.com/support/setting-up-a-glisser-stream-broadcast/ Click into your event/session that you’d like to add a […]
What is a Sponsor Booth? Virtual sponsor booths can be created and added to your event structure so that your sponsors can capture any additional analytics and display any relevant information.There are many options that are available for your sponsors to use: Sponsors can pre-record videos (demos, product pitches, etc.) or host a web-conference and […]
This article guides you through streaming a Microsoft Stream Video, Ask your speakers to record their sessions and send over the file. See here for accepted file types. Login to your Microsoft Stream dashboard and click onto + Create from the tab at the top of the screen. Select Upload Video from the dropdown list. Upload your file by dragging it […]
BlueJeans is a leader in cloud video conferencing that can be used to host video conferences. These video conferences can be embedded, enabling you to stream either BlueJeans meetings or BlueJeans events in Glisser. Setting up your BlueJeans Meetings (limited attendees) To get started on BlueJeans, please log into your account or create a new account. […]
Jitsi is a free service that can be used to host video conferences. These video conferences can be embedded, enabling you to stream Jitsi Meet In Glisser. Use this guide to learn how. Steps to Embed into Glisser Create a Jitsi meeting to your Google or Outlook Calendar. The most straightforward way to do this […]
Please note that Microsoft Teams can not be directly embedded as a live stream in Glisser. This article will cover 3 alternative methods of streaming MS Teams alongside Glisser. Option1: Microsoft Teams to Vimeo/ YouTube With the help of a production team you can ensure that your Microsoft Teams meeting is being streamed via Vimeo […]
Glisser LIVE supports live streams hosted on Facebook Live that have embedding allowed. Schedule Your Stream You can schedule your stream weeks before your event starts which will secure a stream link which we will need to create your Glisser LIVE page. To schedule your stream you will need to: Before you can Live stream […]
Restream is a freemium cloud multistreaming service, headquartered in Austin, Texas. It allows users to simultaneously stream video content to multiple platforms and social networks, including Facebook, YouTube, Twitch, Mixer, and LinkedIn. Restream doesn’t display your streams to an audience directly; instead, they send it off to your end-platforms such as Twitch, YouTube, Mixer, Facebook […]
Twitch is a popular online service for watching and streaming digital video broadcasts. When it was founded in 2011, Twitch originally focused almost entirely on video games but has since expanded to include streams dedicated to artwork creation, music, talk shows and the occasional TV series. Sign in to Twitch To get started with Twitch, […]
To stream live video in up to 1080p HD through Vimeo, you need is camera and a Vimeo Premium or Vimeo Enterprise account – these are both paid accounts. To learn more about Premium and its associated live streaming capabilities, go here. Create Your Stream The first step to going live is creating your event […]
Wistia allows you to upload and host pre-recorded video content. Currently, Wistia is accessible in China, allowing you to reach a wider audience. Prior to hosting any events where you may have Chinese delegates attending, we recommend that you run a test session. Create a Wistia account. There are 3 different plans to choose from: Free plan […]
Glisser LIVE supports Public and Unlisted (not Private) live streams and videos hosted on YouTube. Disclaimer: As a result of COVID-19, YouTube’s content review processes have been disrupted, it is possible for your stream to be taken down for “not supporting” YouTube’s Community Guidelines. You can find specific information about these guidelines in the YouTube […]
This article covers how to schedule your recordings so that they appear live, using OBS Studio. For this guide, you will need: A compatible live streaming service, such as Vimeo, Youtube etc The OBS Studios app, which you can download for free here: https://obsproject.com/ Open your OBS Studio app and click on the Cross at […]
Onestream enables you to schedule a pre-recorded video so that you can play it as live – otherwise known as simulive.The custom RTMP output can be done via any of our broadcast options that accept RTMP (Facebook Live, Youtube, Vimeo, and Twitch).When signing up to a Onestream account, please ensure you purchase the relevant account […]
You will need to ensure that you have the correct Restream account and that it accounts for the number of pre-recorded videos that you will need to upload. There is a limit of 10 pre-recorded slots per account and for each scheduled video, you will require a separate custom RTMP. For example – 10 scheduled […]
Surveys are used to gather feedback or capture more detailed responses from delegates. The Survey will appear as an overlay in the same way other polls do, but instead, will have all the survey questions presented on one screen, rather than as individual questions. Delegates have the ability to respond to feedback questions in text […]
Polling is a great way to both engage the audience and provide yourself with insightful analytics post-event. With Glisser, usability is key and it’s easy to add a range of polls into your presentation, below we have listed our top 20 most useful and commonly used polls to make your event planning even easier. You […]
If you are experiencing real time content not appearing on your device, please follow below steps to help troubleshoot realtime disconnection: visit websocket test site paste wss://sockets.glisser.com/socket.io/?EIO=4&transport=websocket in the Location textbox click connect to check if you are receiving “CONNECTED” in the log window check if you are receiving a “CONNECTED” event back from the […]
As a presenter, you have the option to include an audience question wall (Q&A Feature), where audience members can post questions from their devices. You can choose to either moderate the questions or allow audience members to post directly to the question wall. You can also have pre-set questions, loaded and ready to be answered. […]
Using Zoom and Glisser LIVE together allows you to collectively host and stream a presentation and video call. Zoom through Vimeo It’s possible to stream Zoom through Vimeo for a more professional, recorded and branded set up. First thing you’ll need to do is check that Live Custom Streaming is enabled for your Zoom account: […]
Glisser enables you to broadcast a stream (host a one-way stream using Vimeo, Youtube, or others) or host a video conference (a two-way stream ideal for breakout sessions), below is our guide on what to tell your presenter when using Glisser. Speaker First Steps: Below are the steps a speaker should take to join a […]
Entry listing your Glisser Event is an extra security measure allowing event organizers to limit who can and cannot gain entry into their event, on an individual, or domain level basis. To entry list your attendees means to allow your attendees access to the event; those not added to the entry list will simply get […]
Our Zoom SDK (Software Development Kit) allows you to integrate your Zoom webinar or meetings into Glisser. Before beginning, it’s certainly worth bearing in mind that this link with Zoom currently has more limited features than a direct Zoom call. If you would like to use Glisser and Zoom natively – you can add this as a related content […]
Glisser customers are invited to register for the 'Glisser Customer Success Series' - our weekly training sessions
designed to help you get the most out of Glisser.
These sessions are designed for existing customers. If you're interested in learning more about how Glisser
could help your company, please click here for more information.
For the background image, the format can be either PNG or JPEG. A resolution of 1920×1080 or above works best with a file size limit of 2MB. The background image appears on any of the Glisser generated slides, so on the polls and Q+A wall.
For the logo, we’d recommend no more than 800px x 800px, and to aim for less than 100kb (file size limit is also 2MB). Logos should also have a transparent background.
For additional information please see our guide on selecting a background image.
If you have permitted your audience to download the slides after the presentation is complete, the speaker must push the presentation to the final slide to prompt the option for attendees to download slides and the notes they took during the presentation.
To make sure your audience has the ability to download the presentation, turn on the Download Content toggle on in your Content Settings.
If your speaker/moderator is being asked to log into your Glisser account, this is due to one of these reasons:
If you are having trouble accessing a presentation it could be for one of a number of reasons:
When using Glisser, event organizers and presenters have the option to turn moderation on. This means that they have to accept or approve your question before it is displayed on delegates’ devices and the Q&A wall on the main screen. If your questions are not being displayed, it is likely that your questions have not been accepted by a moderator yet.
Moderation ensures questions remain relevant, grammatically correct, and appropriate. Moderators can approve, deny or edit as they are submitted. Moderators can also reply directly in the Q&A tab.
More information about moderating questions can be found here.
Glisser uses a web-based application that runs in the audience’s browser window. Glisser can therefore operate with all audience devices capable of accessing the internet.
This includes:
Please note that some internal company networks may have restrictions and or firewalls for specific websites and Livestream, so it’s safe to check with your network provider and event organizer if you are experiencing any issues signing up for your event.
Audience members will see the slides and polls shared from your Glisser account, but it doesn’t necessarily mean you also need to show your Glisser presentation on the main screen.
Some examples of when you might want to consider mirroring are:
To mirror your presentation you will need one laptop to present from (to connect to the main screen), and another laptop signed into your Glisser presentation, ideally driven by an event assistant or an AV technician.
The second laptop operates Glisser in Presenter mode, mirroring the progress of the slides on the main screen. This ensures the audience devices are provided with the same slide as the presenter.
If you wish to show audience interaction (polls, Q&A feed, etc.) on the main screen, a switcher is required from the presenter’s laptop to the Glisser laptop, and back again.
You will need a computer or laptop with preferably a hardwire internet connection to run Glisser. Glisser works best on a Chrome browser, which you can download here. Your attendees, however, will be able to access the presentation through whatever browser they have available on their handheld device or laptop (excluding Internet Explorer).
It’s a good idea to mention Glisser in any pre-event communication you have with your delegates to give people a heads-up. On the day, make sure your chair or moderator for the day includes a few words introducing Glisser to the room during the Welcome speech at the start of the day.
Below is our recommended template text, but again we’d recommend tailoring this to your own event.
We’ll be using Glisser today – they’re an event technology company helping to make presentations more interactive and useful for us all.
So they work by sharing slides direct to your phones or devices so you can download today’s presentations, and we’ll also be using Glisser to let you text in questions, and vote in polls throughout the event.
There’s no need to download anything.
Just put this URL: glsr.live/TBC Into your internet browser on your device or phone (chrome or safari are fine). No need for www. in front, and it’s not case sensitive. All you need is to be on our wifi system [read out login details], or just use your 4G data.
To vote in polls, select your answer and press send.
To ask a question, just type your question into the text box at the bottom of your screen and press send.
Glisser will also let you send the slides to your email address after the presentation if you’ve logged in at the start, so there’s no need to take any photos of slides you like the look of. We hope you enjoy using it!
The amount of bandwidth you will need will depend on how many attendees you will be having the day of your event and the bandwidth capabilities of the venue you are utilizing.
We typically recommend 10mbps for 100 attendees and that the Glisser laptops are hardwired.
To activate a session, click on Live Control Panel. You must then click on GO LIVE. This will make your session live and available for delegates to join.
To release all session content click on Publish (Present To The End). This is only available for sessions within an event.
To end a session, click on END SESSION. This will close your session blocking access to any content or live streams.
You can control your presentation and engagement features by using Glisser hotkeys. You can access a list of these keys by pressing the H key on your laptop to pull up the keyboard shortcuts and hotkeys during your presentation, or you can see the keyboard shortcuts and hotkeys here.
When you log into Glisser as an audience member, your email address or device ID number is cached (saved) on the device you’re using to access your presentation.
This is to save you time, as it means you don’t have to re-enter your email address each time you access a presentation or event using Glisser. It’ll also mean Glisser will load much more quickly, using far less data the next time you log into a presentation.
However, it will also mean that if you need to login on the same device using a different email address, or view any changes to the presentation you’re attending, you’ll need to clear your cache. Here’s how:
Chrome (mobile)
Safari (mobile)
Chrome (laptop)
Safari (laptop)
Firefox (laptop)
Whether or not you can access or download the slides (and your notes) after a presentation has finished is determined by the presentation permissions set by the presenter. If the presenter is happy for their slides to be downloaded (along with your personal notes), you will be able to download them from the DOWNLOAD tab.
Whilst the presentation is live you can activate the Send me the presentation toggle and you will be sent an email with the slides and your notes once the presenter ends the presentation.
Once the presentation is over this will become a button and you will be sent the slides and your notes instantly.
Information on turning on downloads for slides and notes can be found here.
To moderate the attendee’s questions, simply select your session and then click the ‘Live Control’ button. Once the session is live you may select ‘moderation’ to see all of the pending, approved and rejected questions.
Yes, Glisser can be used with a clicker.
To use a clicker when presenting with Glisser, simply ensure the clicker is connected to the presenting laptop or device.
Yes, you are able to view a Glisser LIVE page from any mobile device that has access to a modern browser. Glisser LIVE can be used with all audience devices capable of accessing YouTube or LiveStream.
Each Glisser LIVE page (glisser.live/yourcode) supports a single stream and a single Glisser code (glsr.it/yourcode), be it a presentation code or an event code. So whilst Glisser LIVE can used with the Glisser event structure, it can only be with a single stream.
What this essentially means is that Glisser LIVE supports single-room events perfectly. Where there is more than one room, Glisser LIVE can only support one stream at a time – although this doesn’t necessarily mean that all streamed presentations need to be from the same room.
Unfortunately Switcher Studio does not allow you to embed a YouTube video/stream on an external website (it turns the setting off in your YouTube settings). Just as you would embed a stream onto your own website, Glisser LIVE works by embedding your YouTube stream onto your Glisser LIVE page, so unfortunately until Switcher Studio resolve this issue on their platform then we will not be able to host streams from Switcher Studio.
If you are using Stream in your presentation, you can configure the audience user experience to only render the stream player (for embed purposes or other).
In order to do so, an argument can be passed in the audience url:
glsr.live/myPresentation?streamOnly=1
We recommend getting in touch with us at least a month before the date of your event. This provides adequate time for the event to be built, and for us to confirm any technical requirements, especially for particularly large events with a high amount of attendees.
Your Glisser presentation can be uploaded as a PowerPoint (.ppt or .pptx) or PDF (.pdf) file.
Wherever possible, we recommend that you set your Powerpoint or PDF to display with a ratio of 16:9 rather than 4:3 ratio. Keep in mind that when you upload PowerPoints and PDFs into a Glisser presentation, your presentation will lose any animations or gifs that were previously in your presentation.
If you do not use any of the above then you can also upload ODP, JPG, PNG and GIF.
When uploading JPG’s or PNG’s, please ensure the file is stored with a lowercase .jpg or .png as we do not support uppercase .JPG or .PNG.
Once your account has been upgraded you will need to log out of Glisser, then log back in again to access the additional features.
Following a product roadmap, we are constantly updating and improving the Glisser platform. We’d love to know what you think and what you’d like to see in the platform next. Popular feature requests will be slotted into our product roadmap.
If there’s anything you’d love to see in Glisser, please speak to your client experience representative or email us on enquiries@glisser.com and we’ll pass it onto our development team.
Glisser can be used with Prezi in one of two ways:
The first is to save your Prezi presentation as a flat-file (.PPTX or .PDF), then upload it to Glisser. Then, with the help of an assistant, mirror your presentation whilst presenting your fully animated Prezi presentation from the Prezi website. You’ll need to switch to the laptop running Glisser if you want to show Q&A or polls on the main screen.
Alternatively, create polls or audience Q&A sessions in Glisser (just using one PowerPoint slide as a holding slide to create the session). Then, within your Prezi, create a hyperlink to the relevant Glisser presenter URL. That way, Prezi will open up Glisser for a poll or Q&A session at the correct point in your presentation.
Features can be turned on and off to suit your requirements to create a truly custom interactive presentation. The Glisser platform will adapt to create the best audience user experience based on what you’ve selected.
You don’t need to download any software to use Glisser as it’s a web-based application. Glisser runs on any web browser, simply visit https://present.glisser.com and sign up or sign in.
Although Glisser will work on any modern web browser with a good internet connection, for the most reliable experience we recommend using Google Chrome.
Explore our selection of event planning ebooks, webinars and blogs.
